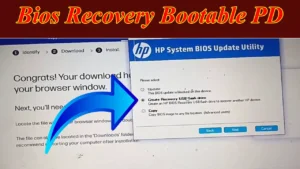
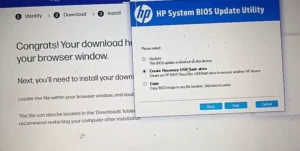
In today’s digital landscape, safeguarding your system against unforeseen issues is crucial. HP laptops and computers offer a safety net in the form of BIOS recovery through a USB flash drive. Whether you’re a tech enthusiast or a casual user, having a recovery USB on hand can be a lifesaver in times of system instability or errors. Here’s a step-by-step guide to creating a recovery USB flash drive for your HP BIOS.
Why Create a Recovery USB Flash Drive for HP BIOS?
Before diving into the process, understanding the significance of a recovery USB is essential. Create a Recovery USB Flash Drive for HP BIOS. The BIOS (Basic Input/output System) serves as the foundation of your computer’s functionality. Issues with BIOS can render your system inoperable. Having a recovery USB allows you to restore the BIOS to a functional state, providing a safety net against potential failures or errors.
Step-by-Step Guide:
1. Ensure Compatibility:
Ensure your HP device supports BIOS recovery via USB. Refer to the HP support page or your device’s user manual for specific instructions.
2. Prepare the USB Flash Drive:
- Use a USB flash drive with sufficient storage capacity (usually 8GB or higher).
- Backup any data on the USB drive as the creation process will erase all existing content.
3. Download BIOS Recovery Files:
- Visit the official HP support website.
- Locate the BIOS recovery files specific to your HP device model.
- Download and save these files to a convenient location on your computer.
4. Format the USB Flash Drive:
- Insert the USB flash drive into an available USB port on your computer.
- Open “File Explorer” (Windows) or “Finder” (Mac).
- Right-click on the USB drive and select “Format.”
- Choose the file system as FAT32 and perform the format.
5. Transfer BIOS Recovery Files to USB Drive:
- Locate the downloaded BIOS recovery files on your computer.
- Copy these files and paste them into the root directory of the formatted USB flash drive.
6. Safely Eject the USB Flash Drive:
- Ensure all files are successfully transferred.
- Safely eject the USB flash drive from your computer.
7. Perform BIOS Recovery:
- Shut down your HP device completely.
- Insert the prepared USB flash drive into a USB port.
- Power on your device and follow the on-screen prompts to initiate the BIOS recovery process using the USB drive.

8. Follow On-Screen Instructions:
- The BIOS recovery process will vary based on your HP device model.
- Follow the on-screen instructions carefully to complete the recovery process.
9. Safely Remove the USB Flash Drive:
- Once the BIOS recovery is successful, power off your device.
- Remove the USB flash drive before restarting your computer.
Conclusion:
Creating a recovery USB flash drive for HP BIOS is a proactive step toward securing your device against potential issues. It’s a straightforward process that ensures you have a safety net in case of BIOS-related emergencies. Remember to always refer to official HP support resources for accurate instructions tailored to your device model.
Having a recovery USB handy can offer peace of mind, knowing that even in the face of BIOS-related challenges, you have the means to restore your system’s functionality.
Stay informed, stay prepared, and safeguard your HP device with a recovery USB flash drive for BIOS!
Get more Click Here
